
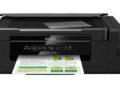
The Epson L210 is a reliable workhorse for homes and small offices. Need to print documents, make copies, or scan important papers? This printer has you covered. To unlock its full potential, you’ll need the correct software. This article dives deep into everything you need to know about the Driver Epson L210 With Copies and Scanner, ensuring a smooth and efficient printing and scanning experience.
Drivers are the unsung heroes of hardware. They act as translators, allowing your computer and the Epson L210 to communicate effectively. Without the correct driver, your computer might not recognize the printer at all. Even if it does, you might experience limited functionality, like an inability to scan or print properly. Think of it like trying to speak a foreign language without a translator – things are bound to get lost in translation.
Identifying the Right Driver for Your Operating System
The Epson L210 driver isn’t a one-size-fits-all solution. It depends on the operating system (OS) your computer is running. Are you using Windows 10, macOS, or an older version like Windows 7? Knowing this is crucial. Visit Epson’s official website to download the driver specifically designed for your OS. Using the wrong driver can lead to compatibility issues, system instability, and a frustrating user experience.
Why Use the Official Epson Website?
Downloading drivers from unofficial sources is risky. These sources often bundle malware, viruses, or other unwanted software with the driver. This can compromise your computer’s security and lead to performance problems. Always prioritize downloading the Driver Epson L210 With Copies and Scanner from the official Epson website. This ensures you get a clean, safe, and genuine driver.
Download Driver Epson L210 With Copies and Scanner
The process of downloading and installing the driver is relatively straightforward.
| Compatible Operating System | Size | Download |
| Windows | ||
| Windows 11, Windows 10 64-bit, Windows 8.1 64-bit, Windows 8 64-bit, Windows 7 64-bit, Windows XP 64-bit, Windows Vista 64-bit | 23.9 MB | Download |
| Windows 10 32-bit, Windows 8.1 32-bit, Windows 8 32-bit, Windows 7 32-bit, Windows XP 32-bit, Windows Vista 32-bit | 20.4 MB | Download |
| Scanner Driver – Windows 11, Windows 10 32-bit, Windows 10 64-bit, Windows 8.1 32-bit, Windows 8.1 64-bit, Windows 8 32-bit, Windows 8 64-bit, Windows 7 32-bit, Windows 7 64-bit, Windows XP 32-bit, Windows XP 64-bit, Windows Vista 32-bit, Windows Vista 64-bit | 19.84 MB | Download |
| Mac OS | ||
| Printer Driver – Mac OS X – PowerPC, Mac OS X – Intel | 113.53 MB | Download |
| Scanner Driver – Mac OS X – PowerPC, Mac OS X – Intel | 14.04 MB | Download |
Installing the Driver: A Clear and Concise Guide
1. Locate the Downloaded File: Find the downloaded driver package on your computer. It’s usually in your Downloads folder.
2. Run the Installer: Double-click the downloaded file to start the installation process.
3. Follow the On-Screen Instructions: The installer will guide you through the installation process. Read each screen carefully and follow the instructions.
4. Connect Your Printer: The installer might prompt you to connect your printer to your computer via USB cable. Make sure your printer is turned on before connecting it.
5. Complete the Installation: Once the installation is complete, restart your computer. This ensures that the driver is properly installed and functioning correctly.
Troubleshooting Common Installation Issues
Sometimes, the installation process doesn’t go as smoothly as planned. Here are some common issues and how to resolve them:
- Driver Installation Fails: This could be due to corrupted driver files or conflicts with existing drivers. Try downloading the driver again or uninstalling any previous Epson drivers before attempting the installation.
- Printer Not Detected: Make sure your printer is turned on and connected to your computer via USB cable. Also, check if the USB cable is properly connected to both the printer and the computer.
- Compatibility Issues: Ensure you’ve downloaded the correct driver for your operating system. Using the wrong driver can lead to compatibility issues and installation failures.
- Firewall or Antivirus Interference: Temporarily disable your firewall or antivirus software during the installation process. Sometimes, these programs can interfere with the driver installation.
Mastering Copying with Your Epson L210
The Epson L210 is more than just a printer; it’s also a copier. Making copies is quick and easy, ideal for duplicating documents without needing a computer.
Simple Copying: A Quick Guide
1. Power On: Ensure your Epson L210 is powered on.
2. Load the Document: Place the document you want to copy face down on the scanner glass. Align it with the corner mark.
3. Select Copy Mode: Press the “Black” or “Color” copy button on the printer control panel.
4. Wait for the Copy: The printer will automatically start copying the document. Wait for the copy to be printed.
Optimizing Copy Quality and Settings
For better copy quality, consider these tips:
- Clean the Scanner Glass: Dust or smudges on the scanner glass can affect the quality of your copies. Clean it with a soft, lint-free cloth.
- Adjust Paper Settings: Ensure the paper settings in your printer driver match the type of paper you’re using.
- Use High-Quality Paper: Using high-quality paper can improve the clarity and sharpness of your copies.
Advanced Copying Features (If Available)
While the L210 is a basic model, some models offer advanced features accessible through the Epson Scan software. Check your documentation to see if you have access to:
- Multiple Copies: Set the number of copies you want to make.
- Copy Density Adjustment: Adjust the darkness or lightness of the copies.
Unleashing the Power of Scanning
The Epson L210’s scanning capabilities can digitize documents, photos, and other important materials.
Scanning with Epson Scan Software
1. Open Epson Scan: Locate and open the Epson Scan software on your computer. This software is usually installed along with the printer driver.
2. Select Scan Mode: Choose the appropriate scan mode based on the type of document you’re scanning. For example, choose “Document Mode” for text documents and “Photo Mode” for photos.
3. Preview the Scan: Click the “Preview” button to preview the scanned image.
4. Adjust Settings: Adjust the scan settings as needed. You can change the resolution, color mode, and other settings to optimize the scan quality.
5. Scan the Document: Click the “Scan” button to start scanning the document.
6. Save the Scan: Once the scan is complete, save the scanned image to your computer in your preferred format (e.g., PDF, JPEG, TIFF).
Understanding Different Scan Modes
Epson Scan offers various scan modes, each optimized for different types of documents:
- Full Auto Mode: This mode is the simplest and most automated. The software automatically detects the type of document and adjusts the scan settings accordingly.
- Home Mode: This mode offers more control over the scan settings. You can choose the document type, image type, and resolution.
- Office Mode: This mode is optimized for scanning text documents. It enhances the text and reduces background noise.
- Professional Mode: This mode offers the most control over the scan settings. You can adjust a wide range of parameters, including color correction, sharpening, and tonal correction.
Optimizing Scan Quality
Achieving high-quality scans requires attention to detail:
- Resolution: Higher resolution results in sharper, more detailed scans. However, it also increases the file size. Choose the appropriate resolution based on your needs. For general documents, 300 DPI is usually sufficient. For photos, 600 DPI or higher is recommended.
- Color Mode: Choose the appropriate color mode based on the type of document you’re scanning. Use “Color” for color documents and photos, “Grayscale” for black and white documents, and “Black & White” for text documents.
- Image Adjustments: Use the image adjustment tools in Epson Scan to improve the scan quality. You can adjust the brightness, contrast, and sharpness of the scanned image.
- Dust Removal: If you’re scanning old or damaged photos, use the dust removal feature to remove dust and scratches from the scanned image.
Scanning Multiple Pages into a Single PDF
Scanning multiple pages into a single PDF is a useful feature for digitizing long documents.
1. Open Epson Scan: Open the Epson Scan software on your computer.
2. Select Scan Mode: Choose the appropriate scan mode.
3. Enable Multi-Page Scanning: Look for the “Multi-Page” or “Document Feeder” option in the scan settings and enable it. (Note: The L210 doesn’t have an automatic document feeder, so this would require manually placing each page on the scanner bed.)
4. Scan Each Page: Scan each page of the document one at a time. The software will automatically add each page to the PDF file.
5. Save the PDF: Once you’ve scanned all the pages, save the PDF file to your computer.
Maintaining Your Epson L210 for Optimal Performance
Proper maintenance is crucial for prolonging the life of your Epson L210 and ensuring optimal performance.
Cleaning the Print Head
A clogged print head can cause print quality issues, such as faded prints or missing lines. Cleaning the print head can resolve these issues.
1. Access the Print Head Cleaning Utility: Open the Epson printer driver on your computer.
2. Navigate to Maintenance: Go to the “Maintenance” or “Utility” tab.
3. Select Print Head Cleaning: Click the “Print Head Cleaning” button.
4. Follow the On-Screen Instructions: The printer will automatically start the print head cleaning process. This process may take a few minutes.
5. Print a Nozzle Check Pattern: After the cleaning is complete, print a nozzle check pattern to verify that the print head is clean. If the nozzle check pattern is still not clear, repeat the print head cleaning process.
Replacing Ink Cartridges
When the ink levels are low, replace the ink cartridges to avoid print quality issues.
1. Open the Printer Cover: Open the printer cover to access the ink cartridges.
2. Identify the Empty Cartridge: Identify the empty or low ink cartridge.
3. Remove the Old Cartridge: Gently remove the old cartridge from the printer.
4. Install the New Cartridge: Remove the new cartridge from its packaging and install it into the printer.
5. Close the Printer Cover: Close the printer cover.
Regular Maintenance Tips
- Keep the Printer Clean: Regularly clean the printer exterior with a soft, dry cloth.
- Use Genuine Epson Ink: Using genuine Epson ink ensures optimal print quality and prevents damage to the printer.
- Store the Printer Properly: When not in use, store the printer in a cool, dry place.
- Update the Driver Regularly: Check for driver updates on the Epson website and install them to ensure optimal performance. Staying up-to-date is key to keeping your Driver Epson L210 With Copies and Scanner functioning at its best.
Conclusion
The Epson L210 is a versatile printer that can handle a variety of tasks, from printing documents to making copies and scanning images. By understanding the importance of the correct Driver Epson L210 With Copies and Scanner and following the tips outlined in this article, you can unlock the full potential of your printer and enjoy a smooth and efficient printing and scanning experience.
Remember to always download drivers from the official Epson website, maintain your printer regularly, and optimize your scan and copy settings for the best possible results. With proper care and attention, your Epson L210 will serve you well for years to come.


