
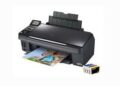
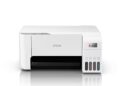
The Epson PictureMate PM-520 is designed for convenience and portability. It’s a small, lightweight printer that delivers exceptional photo quality. Whether you’re printing vacation snapshots, family portraits, or event photos, the PM-520 consistently produces vibrant and long-lasting prints.
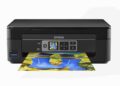
Its compact size makes it ideal for travel, allowing you to print photos on the go. Think of capturing those special moments on a family vacation and immediately sharing printed copies with everyone. It’s a fantastic way to create lasting memories!
Beyond its portability, the PM-520 offers a range of connectivity options, including Wi-Fi, Wi-Fi Direct, and USB. This versatility ensures that you can print from your smartphone, tablet, computer, or even directly from a USB drive or memory card.
What Is the Epson PictureMate PM-520?
The Epson PictureMate PM-520 is a dedicated photo printer designed for printing high-quality, borderless photos up to 5×7 inches in size. It utilizes Epson’s advanced inkjet technology to deliver vibrant colors, sharp details, and exceptional durability. Unlike standard inkjet printers, the PictureMate PM-520 uses a special dye-based ink that is specifically formulated for photo printing. This ink is designed to resist fading, smudging, and water damage, ensuring that your photos will last for generations.
Here’s a breakdown of what makes the Epson PictureMate PM-520 stand out:
- Compact and Portable Design: Easily carry it anywhere.
- High-Quality Photo Prints: Delivers vivid colors and sharp details.
- Borderless Printing: Creates professional-looking photos without borders.
- Durable Prints: Uses fade-resistant and water-resistant ink.
- Multiple Connectivity Options: Connects via Wi-Fi, Wi-Fi Direct, and USB.
- Easy to Use: Intuitive interface for simple operation.
- Long-Lasting Ink Cartridges: Reduces the frequency of ink replacements.
- Affordable Printing: Offers a cost-effective solution for printing photos at home.
The Epson PictureMate PM-520 is more than just a printer; it’s a memory-making machine. It empowers you to transform digital photos into tangible keepsakes that you can cherish and share with your loved ones.
Why Installing the Right Driver Epson PictureMate PM-520 Matters
Installing the correct driver for your Epson PictureMate PM-520 is crucial for ensuring optimal performance and functionality. The driver acts as a translator between your computer’s operating system and the printer, enabling them to communicate effectively. Without the correct driver, your computer may not recognize the printer, or the printer may not function properly.
Here’s why installing the right driver is so important:
- Proper Printer Recognition: The correct driver allows your computer to recognize and communicate with the printer.
- Full Functionality: The driver enables all the features of the printer, such as borderless printing, paper size selection, and color management.
- Optimal Print Quality: The driver ensures that your photos are printed with the correct colors, sharpness, and detail.
- Avoidance of Errors: Using the wrong driver can lead to printing errors, such as incorrect paper size, distorted images, or printer malfunctions.
- Stability and Reliability: The correct driver ensures stable and reliable performance, preventing crashes and other issues.
- Security: Official drivers from Epson are safe and free from malware. Downloading drivers from unofficial sources can expose your computer to security risks.
Using a generic driver or an outdated driver can lead to a frustrating printing experience. You might encounter problems like:
- The printer not being recognized by your computer.
- Inability to select specific paper sizes or print settings.
- Poor print quality with inaccurate colors or blurry details.
- Frequent printer errors or crashes.
To avoid these issues, always download and install the latest driver for your Epson PictureMate PM-520 from the official Epson website. This will ensure that your printer works correctly and delivers the best possible results.
Download Driver Epson PictureMate PM-520 (Official Links)
Downloading the driver from the official Epson website is the safest and most reliable way to ensure you have the correct software for your Epson PictureMate PM-520. Here are the official links to download the drivers for different operating systems:
| Compatible Operating System | Size | Download |
| Windows | ||
| Windows 11 64-bit, Windows 10 64-bit, Windows 8.1 64-bit, Windows 8 64-bit, Windows 7 64-bit, Windows XP 64-bit, Windows Vista 64-bit | 29.27 MB | Download |
| Windows 10 32-bit, Windows 8.1 32-bit, Windows 8 32-bit, Windows 7 32-bit, Windows XP 32-bit, Windows Vista 32-bit | 26.59 MB | Download |
| Mac OS | ||
| Printer Driver – Mac OS X – Intel, Mac OS X – PowerPC | 34.25 MB | Download |
Important Notes:
- Always download drivers from the official Epson website. Avoid downloading drivers from third-party websites, as they may contain malware or outdated software.
- Make sure to select the correct operating system. Downloading the wrong driver can cause compatibility issues.
- Read the instructions carefully before installing the driver. Follow the steps provided by Epson to ensure a smooth installation process.
Here are some direct links for your convenience (please verify on the official Epson website to ensure they are still current and appropriate for your specific operating system):
- Example for Windows: (Search on the Epson website for “Epson PictureMate PM-520 drivers Windows” to find the exact link for your Windows version).
- Example for macOS: (Search on the Epson website for “Epson PictureMate PM-520 drivers macOS” to find the exact link for your macOS version).
Always double-check the Epson website to ensure you are downloading the latest and most appropriate driver for your Epson PictureMate PM-520 and your specific operating system.
How to Install Epson PictureMate PM-520 Driver on Windows
Once you’ve downloaded the driver package for your Epson PictureMate PM-520 from the official Epson website, follow these steps to install it on your Windows computer:
1. Locate the Downloaded File: Find the downloaded driver package on your computer. It’s usually in your “Downloads” folder.
2. Run the Installer: Double-click the downloaded file to start the installation process. You may be prompted to allow the program to make changes to your computer. Click “Yes” to continue.
3. Follow the On-Screen Instructions: The Epson installer will guide you through the installation process. Read each screen carefully and follow the instructions.
4. Select Your Connection Method: Choose your preferred connection method (USB or Wi-Fi). If you choose USB, connect the printer to your computer using a USB cable. If you choose Wi-Fi, follow the instructions to connect the printer to your wireless network.
5. Agree to the License Agreement: Read the license agreement carefully and click “Agree” to continue.
6. Complete the Installation: The installer will copy the necessary files to your computer and configure the printer. This process may take a few minutes.
7. Test the Printer: Once the installation is complete, print a test page to ensure that the printer is working correctly.
8. Restart Your Computer (If Prompted): In some cases, you may be prompted to restart your computer after the installation is complete.
Detailed Step-by-Step Instructions:
- Step 1: Locate the Downloaded File: The downloaded file will likely have a name similar to “Epson_PM-520_Driver.exe”.
- Step 2: Run the Installer: Right-click on the file and select “Run as administrator” for smoother installation.
- Step 3: Follow the On-Screen Instructions: Pay close attention to the language selection option during the initial setup.
- Step 4: Select Your Connection Method:
USB: Ensure the printer is powered on and connected to your computer using a USB cable before selecting this option. Windows should automatically detect the printer once the driver is installed.
Wi-Fi: The installer will guide you through selecting your Wi-Fi network and entering the password. Ensure your computer and the printer are on the same network.
- Step 5: Agree to the License Agreement: It’s always a good idea to skim through the license agreement before agreeing.
- Step 6: Complete the Installation: Be patient and allow the installation process to finish completely. Avoid interrupting the process.
- Step 7: Test the Printer: Open a document or photo and select “Print”. Choose the Epson PictureMate PM-520 as your printer and click “Print”.
- Step 8: Restart Your Computer (If Prompted): Restarting ensures all the changes are properly implemented.
By following these steps carefully, you can successfully install the Epson PictureMate PM-520 driver on your Windows computer and start printing your favorite photos.
How to Install Epson PictureMate PM-520 Driver on macOS
Installing the Epson PictureMate PM-520 driver on macOS is a straightforward process. Follow these steps:
1. Locate the Downloaded File: Find the downloaded driver package on your Mac. It’s usually in your “Downloads” folder and will likely be a .dmg file.
2. Open the DMG File: Double-click the downloaded .dmg file to mount it. This will create a virtual disk on your desktop.
3. Run the Installer: Open the mounted disk and double-click the installer package (usually a .pkg file).
4. Follow the On-Screen Instructions: The Epson installer will guide you through the installation process. Read each screen carefully and follow the instructions.
5. Agree to the License Agreement: Read the license agreement carefully and click “Agree” to continue.
6. Select Your Installation Location: Choose the location where you want to install the driver. The default location is usually recommended.
7. Enter Your Administrator Password: You may be prompted to enter your administrator password to authorize the installation.
8. Complete the Installation: The installer will copy the necessary files to your Mac and configure the printer. This process may take a few minutes.
9. Add the Printer: After the installation is complete, you may need to add the printer to your list of printers in System Preferences.
Go to “System Preferences” > “Printers & Scanners”.
Click the “+” button to add a new printer.
Select the Epson PictureMate PM-520 from the list of available printers.
Click “Add”.
10. Test the Printer: Print a test page to ensure that the printer is working correctly.
Detailed Step-by-Step Instructions:
- Step 1: Locate the Downloaded File: Look for a file with a name like “Epson_PM-520_Driver.dmg”.
- Step 2: Open the DMG File: Once the .dmg file is opened, a new icon will appear on your desktop, resembling a hard drive.
- Step 3: Run the Installer: Within the mounted disk, find the .pkg file (e.g., “Epson Printer Driver.pkg”) and double-click it.
- Step 4: Follow the On-Screen Instructions: The installer will guide you through the steps. Pay attention to any prompts asking for permission to access files or folders.
- Step 5: Agree to the License Agreement: Review the license agreement before accepting it.
- Step 6: Select Your Installation Location: The default location is generally fine for most users.
- Step 7: Enter Your Administrator Password: This is required to allow the installer to make changes to your system.
- Step 8: Complete the Installation: Wait for the installation to finish without interrupting the process.
- Step 9: Add the Printer: This is a crucial step to ensure your Mac recognizes the printer.
If the printer is not automatically detected, ensure it’s powered on and connected to your network (if using Wi-Fi) or to your Mac via USB.
When adding the printer, make sure the correct driver is selected in the “Use” dropdown menu.
- Step 10: Test the Printer: Open a document or photo, select “Print”, choose the Epson PictureMate PM-520, and click “Print”.
By following these instructions, you can successfully install the Epson PictureMate PM-520 driver on your macOS system and start printing your cherished photos.
Troubleshooting Epson PictureMate PM-520 Driver Installation Issues
Even with careful installation, you might encounter issues while installing the Epson PictureMate PM-520 driver. Here are some common problems and their solutions:
- Problem: Printer Not Recognized:
Solution: Ensure the printer is powered on and connected to your computer. Check the USB cable or Wi-Fi connection. Restart your computer and the printer. Try a different USB port. Reinstall the driver.
- Problem: Installation Fails:
Solution: Ensure you have downloaded the correct driver for your operating system. Disable your antivirus software temporarily during the installation process. Run the installer as administrator. Check for conflicting software or drivers.
- Problem: Error Messages During Installation:
Solution: Note the specific error message and search online for solutions. Check the Epson support website for troubleshooting tips. Ensure you have enough disk space for the installation.
- Problem: Printer Works Partially:
Solution: Ensure you have selected the correct printer driver in your print settings. Check the paper size and print quality settings. Clean the print heads using the Epson printer utility.
- Problem: Wi-Fi Connection Issues:
Solution: Ensure the printer is connected to the same Wi-Fi network as your computer. Check the Wi-Fi password. Restart your router and the printer. Update the printer’s firmware.
- Problem: Driver Conflicts:
Solution: Remove any previous printer drivers or software related to Epson printers. Use a driver uninstaller utility to completely remove the old drivers. Reinstall the Epson PictureMate PM-520 driver.
More Detailed Troubleshooting Steps:
- Check the Basics: Always start with the simplest solutions first. Is the printer plugged in? Is the power switch on? Is the USB cable securely connected?
- Restart Everything: Restarting your computer and the printer can often resolve minor software glitches.
- Run the Troubleshooter: Windows has a built-in printer troubleshooter that can automatically diagnose and fix common printing problems.
- Update Windows/macOS: Ensure your operating system is up to date with the latest updates and patches.
- Check Device Manager (Windows): Open Device Manager and look for any errors or warnings related to the printer. If you see a yellow exclamation mark, right-click on the device and select “Update driver”.
- Reset Printing System (macOS): Go to “System Preferences” > “Printers & Scanners”, right-click in the printer list, and select “Reset printing system”. This will remove all your printers, so you’ll need to add them again.
- Contact Epson Support: If you’ve tried all the troubleshooting steps and are still having problems, contact Epson support for assistance.
By systematically troubleshooting the issue, you can usually resolve most driver installation problems and get your Epson PictureMate PM-520 up and running smoothly.
Best Practices After Installation Driver Epson PictureMate PM-520
After successfully installing the Epson PictureMate PM-520 driver, follow these best practices to ensure optimal performance and longevity of your printer:
- Keep Your Driver Updated: Regularly check the Epson support website for driver updates and install them as soon as they become available. Updated drivers often include bug fixes, performance improvements, and new features.
- Use Genuine Epson Ink Cartridges: Using genuine Epson ink cartridges ensures the best print quality and prevents damage to the print heads. Generic or refilled cartridges may not be compatible and can cause printing problems.
- Calibrate Your Printer: Periodically calibrate your printer to ensure accurate color reproduction. The Epson printer utility usually includes a calibration tool.
- Clean the Print Heads: Regularly clean the print heads to prevent clogging and maintain print quality. The Epson printer utility provides a print head cleaning function.
- Use High-Quality Photo Paper: Use high-quality photo paper designed for inkjet printers to achieve the best results. Avoid using low-quality paper, as it can cause smudging and poor print quality.
- Store Your Photos Properly: Store your printed photos in a cool, dry place away from direct sunlight to prevent fading and discoloration.
- Power Off the Printer When Not in Use: Powering off the printer when not in use can save energy and prolong the life of the printer.
- Run Regular Maintenance: Utilize the printer’s maintenance functions (e.g., nozzle check, print head alignment) to ensure it’s operating at its best.
- Proper Shutdown Procedure: Always turn off the printer using the power button and wait for it to complete its shutdown process before unplugging it.
Elaborating on Key Best Practices:
- Genuine Epson Ink: While third-party ink cartridges might seem cheaper, they can damage the print heads and void your warranty.
- Printer Calibration: This ensures that the colors you see on your screen are accurately reproduced in your prints.
- Print Head Cleaning: Dust and dried ink can clog the print heads, resulting in streaks or missing colors in your prints. Regular cleaning is essential.
- Photo Paper Selection: Different types of photo paper are designed for different purposes. Choose the right paper for the type of photos you’re printing.
By following these best practices, you can maximize the performance and lifespan of your Epson PictureMate PM-520 and enjoy stunning, long-lasting photo prints for years to come.
Conclusion
The Epson PictureMate PM-520 is a fantastic portable photo printer that delivers high-quality prints with ease. Its compact design, multiple connectivity options, and durable prints make it a perfect companion for capturing and sharing memories on the go.
By understanding its features, installing the correct driver, troubleshooting potential issues, and following best practices, you can unlock the full potential of your Epson PictureMate PM-520 and enjoy years of vibrant and lasting photo prints. Remember to always download your drivers from the official Epson website to ensure a safe and reliable experience. So, go ahead, print those precious memories and share them with the world!


