
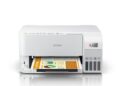
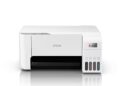
The Epson L5190 Multifunction WiFi printer is a versatile workhorse, capable of handling a wide range of tasks from printing documents and photos to scanning and copying. However, to truly unlock its potential, you need the right drivers. This article explores everything you need to know about the Driver Epson L5190 Multifunction Wifi, ensuring seamless operation and optimal performance. We’ll cover installation, troubleshooting, advanced settings, and more, providing you with the knowledge to keep your printer running smoothly.
Why Are Drivers So Important?
Drivers act as translators between your computer and the printer. Without the correct Driver Epson L5190 Multifuction Wifi, your computer won’t be able to properly communicate with the printer, leading to errors, limited functionality, or even complete failure. Think of it like trying to speak to someone who only understands a different language; you might get some basic ideas across, but nuanced communication will be impossible.
Download Driver Epson L5190 Multifuction Wifi
The first step to ensuring optimal performance is locating the correct driver for your specific operating system. Epson provides drivers for Windows, macOS, and even Linux-based systems. Let’s explore how to find the right one.
| Compatible Operating System | Size | Download |
| Windows | ||
| Windows 11 64-bit, Windows 10 64-bit, Windows 8.1 64-bit, Windows 8 64-bit, Windows 7 64-bit, Windows XP 64-bit, Windows Vista 64-bit | 32 MB | Download |
| Windows 10 32-bit, Windows 8.1 32-bit, Windows 8 32-bit, Windows 7 32-bit, Windows XP 32-bit, Windows Vista 32-bit | 28 MB | Download |
| Scanner Driver – Windows 11 64-bit, Windows 10 64-bit, Windows 8.1 64-bit, Windows 8 64-bit, Windows 7 64-bit, Windows XP 64-bit, Windows Vista 64-bit, Windows 10 32-bit, Windows 8.1 32-bit, Windows 8 32-bit, Windows 7 32-bit, Windows XP 32-bit, Windows Vista 32-bit | 60.64 MB | Download |
| Mac OS | ||
| Printer Driver – Mac OS X – Intel, Mac OS X – PowerPC | 52.24 MB | Download |
| Scanner Driver – Mac OS X – Intel | 24.2 MB | Download |
Installing the Driver Epson L5190 Multifuction Wifi
Once you’ve identified the correct Driver Epson L5190 Multifuction Wifi for your operating system, click the download button. After the download is complete, follow these steps to install the driver:
- Windows:
Locate the downloaded file (usually in your “Downloads” folder).
Double-click the file to run the installer.
Follow the on-screen instructions. The installer will guide you through the process, which usually involves accepting a license agreement and selecting installation options.
You may be prompted to connect your printer to your computer during the installation process. Make sure your printer is turned on and connected via USB cable or WiFi.
- macOS:
Locate the downloaded file (usually a DMG file).
Double-click the DMG file to mount it.
A new window will appear with the installer package.
Double-click the installer package to run it.
Follow the on-screen instructions.
You may be prompted to add the printer in System Preferences. Follow the instructions to add the L5190 to your list of printers.
Connecting Your Epson L5190 via WiFi
The Epson L5190 boasts WiFi connectivity, allowing you to print wirelessly from your computer, smartphone, or tablet. Setting up WiFi is crucial for convenience and flexibility.
1. Initial WiFi Setup
Most Epson printers have a built-in setup wizard to guide you through the WiFi connection process.
- Turn on your Epson L5190 printer.
- Navigate to the printer’s control panel menu.
- Look for a “Setup,” “Network Settings,” or “WiFi Setup” option.
- Select the option to connect to a WiFi network.
- The printer will scan for available WiFi networks.
- Select your WiFi network from the list.
- Enter your WiFi password when prompted.
- The printer will attempt to connect to your network. Once connected, it will display a confirmation message.
2. Connecting Your Computer to the Printer via WiFi
Once the printer is connected to your WiFi network, you need to add it to your computer.
- Windows:
Go to “Settings” > “Devices” > “Printers & scanners.”
Click “Add a printer or scanner.”
Windows will search for available printers on your network.
Select your Epson L5190 from the list.
Click “Add device.”
- macOS:
Go to “System Preferences” > “Printers & Scanners.”
Click the “+” button to add a printer.
Select your Epson L5190 from the list.
Click “Add.”
Troubleshooting Common Driver and Connectivity Issues
Even with the correct drivers installed, you might encounter occasional issues. Here are some common problems and their solutions:
1. Printer Not Found
- Check the connection: Ensure the printer is turned on and connected to the same WiFi network as your computer. If using a USB connection, make sure the cable is securely plugged in.
- Restart the printer and computer: A simple restart can often resolve connectivity issues.
- Update the driver: Outdated or corrupted drivers can cause connectivity problems. Re-download and reinstall the Driver Epson L5190 Multifuction Wifi from the Epson support website.
- Firewall settings: Your firewall might be blocking communication between your computer and the printer. Check your firewall settings and ensure that the Epson printer is allowed to communicate through the firewall.
2. Printing Errors
- Check the paper: Ensure that there is paper in the paper tray and that it is loaded correctly.
- Check the ink levels: Low ink levels can cause printing errors. Replace any empty or low ink cartridges.
- Clear the print queue: Sometimes, stuck print jobs can cause errors. Clear the print queue by going to “Settings” > “Devices” > “Printers & scanners,” selecting your printer, and clicking “Open print queue.” Delete any pending print jobs.
- Driver corruption: If you’re still experiencing printing errors, the driver might be corrupted. Try uninstalling and reinstalling the Driver Epson L5190 Multifuction Wifi.
3. Scanning Issues
- Ensure the scanner driver is installed: You need the scanner driver installed to use the scanning functionality.
- Use the Epson Scan Utility: This software provides a user interface for scanning documents and photos.
- Check the scanner glass: Make sure the scanner glass is clean and free of smudges or debris.
- Driver conflicts: If you have other scanning software installed, it might be conflicting with the Epson scanner driver. Try uninstalling any conflicting software.
Advanced Driver Settings and Optimization
Beyond basic installation, exploring the advanced settings of your Driver Epson L5190 Multifuction Wifi can further enhance your printing experience.
1. Print Quality Settings
The driver allows you to adjust the print quality settings. Higher print quality settings will result in sharper and more detailed prints, but they will also consume more ink and take longer to print.
- Draft: The fastest and most economical setting, suitable for printing documents where quality is not critical.
- Standard: A good balance between print quality and speed, suitable for everyday printing.
- High: Produces high-quality prints with sharp details and vibrant colors, suitable for printing photos and important documents.
2. Paper Type Settings
Selecting the correct paper type in the driver settings is crucial for achieving optimal print quality. Different paper types absorb ink differently, and using the wrong setting can result in blurry or faded prints.
- Plain Paper: Use this setting for printing on standard copy paper.
- Epson Matte Paper: Use this setting for printing on Epson matte paper.
- Epson Glossy Paper: Use this setting for printing on Epson glossy photo paper.
3. Color Management
The driver includes color management options that allow you to fine-tune the color output of your printer.
- Color Mode: Choose between different color modes, such as “sRGB” and “Adobe RGB,” depending on your needs.
- Color Adjustments: Manually adjust the brightness, contrast, and color saturation of your prints.
4. Two-Sided Printing (Duplex)
The Epson L5190 supports automatic two-sided printing, which can save paper and reduce printing costs. Enable the two-sided printing option in the driver settings to automatically print on both sides of the paper.
Keeping Your Drivers Up-to-Date
Regularly updating your Driver Epson L5190 Multifuction Wifi is essential for maintaining optimal performance and resolving potential issues. Epson typically releases driver updates to improve compatibility, fix bugs, and enhance functionality.
1. Using the Epson Software Updater
The Epson Software Updater is a tool that automatically checks for and installs driver updates. You can usually find this tool installed on your computer after installing the printer drivers. Run the Epson Software Updater periodically to ensure that you have the latest drivers and software for your printer.
2. Manually Checking for Updates
You can also manually check for driver updates on the Epson support website. Follow the steps outlined earlier to find the drivers for your printer, and then compare the version numbers of the drivers on the website with the version numbers of the drivers installed on your computer. If there are newer versions available on the website, download and install them.
Conclusion: Mastering Your Epson L5190 Through Proper Driver Management
The Epson L5190 Multifunction WiFi printer is a powerful and versatile tool, and understanding how to properly manage its drivers is key to unlocking its full potential. By following the steps outlined in this article, you can ensure that your printer is running smoothly, efficiently, and reliably. Remember to always download drivers from the official Epson support website, keep your drivers up-to-date, and explore the advanced settings to optimize your printing experience.
With the right Driver Epson L5190 Multifuction Wifi and a little bit of knowledge, you can confidently tackle any printing, scanning, or copying task with ease. Regularly checking for updates and proactively addressing any issues will ensure the longevity and optimal performance of your Epson L5190, making it a valuable asset for your home or office.


