
The Driver Printer Epson L355 Wi-Fi System is crucial for seamless printing from your computer or mobile device. Setting it up correctly ensures you can take full advantage of this versatile all-in-one printer. This article provides a comprehensive guide on installing the driver, troubleshooting common issues, and optimizing your printing experience. We’ll walk you through each step with clarity and practical advice.
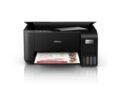
The Epson L355 is a popular choice for home and small office users, known for its affordability, integrated ink tank system, and wireless connectivity. However, like any printer, it requires the correct driver software to function properly.
Key Features of the Epson L355
- Wireless Connectivity: Print from anywhere on your Wi-Fi network.
- Integrated Ink Tank System: Cost-effective printing with refillable ink tanks.
- All-in-One Functionality: Print, scan, and copy capabilities.
- Compact Design: Fits easily into most workspaces.
Understanding these features is the first step to maximizing your printer’s potential. Next, let’s delve into the driver installation process.
Installing the Epson L355 Wi-Fi Printer Driver
The driver is the software that allows your computer to communicate with the printer. Without it, your computer won’t recognize the printer, and you won’t be able to print.
Download Driver Printer Epson L355 Wifi System
The first step is to download the correct driver for your operating system (Windows or macOS) from Epson’s official website.
| Compatible Operating System | Size | Download |
| Windows | ||
| Windows 11, Windows 10 64-bit, Windows 8.1 64-bit, Windows 8 64-bit, Windows 7 64-bit, Windows XP 64-bit, Windows Vista 64-bit | 23.3 MB | Download |
| Windows 10 32-bit, Windows 8.1 32-bit, Windows 8 32-bit, Windows 7 32-bit, Windows XP 32-bit, Windows Vista 32-bit | 36.90 MB | Download |
| Driver Scanner – Windows 11,Windows 10 64-bit, Windows 8.1 64-bit, Windows 8 64-bit, Windows 7 64-bit, Windows XP 64-bit, Windows Vista 64-bit, Windows 10 32-bit, Windows 8.1 32-bit, Windows 8 32-bit, Windows 7 32-bit, Windows XP 32-bit, Windows Vista 32-bit | 21.45 MB | Download |
| Mac OS | ||
| Printer Driver – Mac OS X – PowerPC, Mac OS X – Intel | 113 MB | Download |
| Scanner Driver – Mac OS X – PowerPC, Mac OS X – Intel | 17.39 MB | Download |
Installation Process on Windows
Installing the driver on Windows is generally straightforward.
1. Run the Installer: Locate the downloaded file (usually an executable file with a `.exe` extension) and double-click it to start the installation process.
2. Follow the On-Screen Instructions: The installer will guide you through the installation process. Accept the license agreement and choose the installation options that suit your needs.
3. Connect Your Printer: The installer will prompt you to connect your printer to your computer. You can connect it via USB cable or choose the Wi-Fi connection option.
4. Wi-Fi Setup: If you choose Wi-Fi, the installer will search for available networks. Select your network and enter the password if prompted.
5. Complete the Installation: Follow the remaining instructions to complete the installation. The installer may ask you to restart your computer.
Installation Process on macOS
The installation process on macOS is similar to Windows.
1. Run the Installer: Locate the downloaded file (usually a `.dmg` file) and double-click it to mount the disk image.
2. Open the Installer Package: Inside the mounted disk image, you’ll find an installer package (a `.pkg` file). Double-click it to start the installation process.
3. Follow the On-Screen Instructions: The installer will guide you through the installation process. Accept the license agreement and choose the installation options that suit your needs.
4. Add the Printer in System Preferences: After the installation, you may need to add the printer manually in System Preferences. Go to “System Preferences” > “Printers & Scanners” and click the “+” button to add your printer.
5. Select Your Printer: Your printer should appear in the list of available printers. Select it and click “Add.”
Verifying the Installation
After installation, it’s important to verify that the printer is working correctly.
1. Print a Test Page: Go to your computer’s “Printers & Scanners” settings and select your Epson L355 printer. Click on “Manage” or “Properties” and then “Print Test Page.”
2. Check the Printing Quality: If the test page prints correctly, your printer driver is installed and working properly. Check the print quality to ensure that the colors are accurate and the text is clear.
Troubleshooting Common Driver Issues
Even with careful installation, you might encounter some issues. Here are some common problems and their solutions.
Printer Not Found
If your computer cannot find the printer, even after installing the driver, try these steps:
1. Check the Connection: Ensure that the printer is turned on and connected to the same Wi-Fi network as your computer.
2. Restart the Printer and Computer: Sometimes, a simple restart can resolve connection issues.
3. Run the Printer Troubleshooter: Windows has a built-in printer troubleshooter that can automatically detect and fix common problems. Go to “Settings” > “Update & Security” > “Troubleshoot” > “Printer.”
4. Reinstall the Driver: If the troubleshooter doesn’t fix the problem, try uninstalling and reinstalling the driver.
Printing Errors
If you’re getting printing errors, such as “Printer Offline” or “Document Failed to Print,” try these solutions:
1. Check the Printer Status: Make sure the printer is not in an error state (e.g., paper jam, low ink).
2. Clear the Print Queue: Sometimes, stuck print jobs can cause errors. Clear the print queue by going to “Printers & Scanners,” selecting your printer, and clicking “Open Print Queue.” Cancel any pending print jobs.
3. Update the Driver: An outdated driver can cause printing errors. Check the Epson website for the latest driver version.
4. Check the Ink Levels: Low ink levels can cause printing problems. Refill the ink tanks if necessary.
Wi-Fi Connectivity Problems
If you’re having trouble connecting to the printer via Wi-Fi, try these steps:
1. Check the Wi-Fi Signal: Ensure that the printer has a strong Wi-Fi signal. Move the printer closer to the router if necessary.
2. Restart the Router: Restarting your Wi-Fi router can often resolve connectivity issues.
3. Reconfigure the Wi-Fi Settings on the Printer: Use the printer’s control panel to reconfigure the Wi-Fi settings. Enter the correct network name (SSID) and password.
4. Update the Printer Firmware: Sometimes, updating the printer’s firmware can improve Wi-Fi connectivity. Check the Epson website for firmware updates.
Driver Conflicts
Driver conflicts can occur if you have multiple printer drivers installed on your computer.
1. Uninstall Conflicting Drivers: Go to “Device Manager” and look for any conflicting printer drivers. Uninstall them and restart your computer.
2. Reinstall the Epson L355 Driver: After removing the conflicting drivers, reinstall the Epson L355 driver.
Optimizing Your Printing Experience
Once you have the driver installed and working correctly, you can optimize your printing experience by adjusting the printer settings.
Print Quality Settings
Adjusting the print quality settings can improve the appearance of your prints.
1. Access Printer Properties: Go to “Printers & Scanners,” select your Epson L355 printer, and click “Manage” or “Properties.”
2. Adjust Print Quality: In the printer properties, look for the “Print Quality” or “Paper/Quality” tab. Choose the desired print quality (e.g., Draft, Standard, High). Higher print quality settings will use more ink and take longer to print.
Paper Type Settings
Selecting the correct paper type can also improve print quality.
1. Access Printer Properties: As before, go to “Printers & Scanners,” select your Epson L355 printer, and click “Manage” or “Properties.”
2. Select Paper Type: In the printer properties, look for the “Paper Type” or “Media Type” setting. Choose the paper type that matches the paper you’re using (e.g., Plain Paper, Glossy Photo Paper).
Color Management
Proper color management ensures that your prints have accurate colors.
1. Calibrate Your Monitor: Calibrating your monitor can help ensure that the colors you see on your screen are accurate.
2. Use Color Profiles: Use color profiles (ICC profiles) that are specific to your printer and paper. You can usually download these profiles from the paper manufacturer’s website.
3. Adjust Color Settings in the Printer Driver: In the printer properties, look for the “Color Management” or “Color Options” settings. Choose the appropriate color profile and adjust the color settings as needed.
Utilizing the Epson iPrint App
The Epson iPrint app allows you to print from your smartphone or tablet.
1. Download the App: Download the Epson iPrint app from the App Store (iOS) or Google Play Store (Android).
2. Connect to Your Printer: Open the app and follow the instructions to connect to your Epson L355 printer. The app will automatically search for printers on your Wi-Fi network.
3. Print Documents and Photos: Once connected, you can print documents and photos directly from your mobile device.
Maintaining Your Epson L355 Printer
Regular maintenance can help keep your Epson L355 printer running smoothly.
Cleaning the Print Head
The print head can become clogged over time, resulting in poor print quality.
1. Run the Print Head Cleaning Utility: The Epson printer driver includes a print head cleaning utility. Go to “Printers & Scanners,” select your Epson L355 printer, click “Manage” or “Properties,” and look for the “Maintenance” or “Utility” tab.
2. Follow the Instructions: Follow the instructions to run the print head cleaning utility. This process may take a few minutes.
Replacing Ink
Refill the ink tanks when the ink levels are low.
1. Check Ink Levels: Monitor the ink levels using the printer’s control panel or the Epson printer driver.
2. Purchase Ink: Purchase genuine Epson ink bottles for the L355 model.
3. Refill the Ink Tanks: Follow the instructions in the printer’s manual to refill the ink tanks. Be careful not to spill any ink.
Updating Firmware
Updating the printer’s firmware can improve performance and fix bugs.
1. Check for Firmware Updates: Go to the Epson website and search for firmware updates for your Epson L355 printer.
2. Download and Install the Firmware: Download the firmware update and follow the instructions to install it. Be sure to follow the instructions carefully to avoid damaging the printer.
Conclusion
Ensuring the Driver Printer Epson L355 Wi-Fi System is correctly installed and maintained is essential for optimal performance. By following the steps outlined in this guide, you can successfully install the driver, troubleshoot common issues, and optimize your printing experience. Remember to regularly maintain your printer and keep the driver updated for the best results.
The Epson L355 is a reliable printer when properly managed, providing cost-effective and high-quality printing for your home or small office needs. With the right knowledge and a little bit of effort, you can keep your Epson L355 printer running smoothly for years to come.


download Epson Printer L355 series for good 🙂