
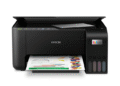
The Epson Expression Premium XP-7100 is a versatile all-in-one printer known for its high-quality photo printing, user-friendly interface, and comprehensive features. To ensure your XP-7100 performs optimally, having the correct Driver Epson Expression Premium XP-7100 installed is crucial. This article will guide you through the process of finding, installing, and troubleshooting drivers, as well as explore the printer’s capabilities and how to maximize its potential.
Drivers act as the communication bridge between your computer and the printer. Without the appropriate driver, your computer won’t be able to properly send print jobs, scan documents, or utilize the printer’s various features.
The Role of Drivers in Printer Functionality
Think of a driver as a translator. The computer speaks one language (its operating system), and the printer speaks another. The driver translates the computer’s instructions into a language the printer understands, allowing it to correctly print, scan, and copy. A missing or outdated driver can lead to printing errors, scanner malfunctions, or even complete device unresponsiveness.
Consequences of Using Incorrect or Outdated Drivers
Using the wrong or an outdated driver can result in a variety of issues:
- Printing Errors: Garbled text, incorrect colors, or incomplete printouts.
- Scanning Issues: Failure to scan documents, distorted images, or software crashes.
- Connectivity Problems: The printer may not be recognized by your computer at all.
- Reduced Functionality: Some features of the printer, such as duplex printing or wireless connectivity, may not work correctly.
- Security Vulnerabilities: In some rare cases, outdated drivers can pose security risks.
Download Driver Epson Expression Premium XP-7100
The most reliable way to obtain the correct driver is directly from Epson’s official website.
| Compatible Operating System | Size | Download |
| Windows | ||
| Printer Driver – Windows 10 x64, Windows 8.1 x64, Windows 8 x64, Windows 7 x64, Windows Vista x64, Windows x64 | 33.08 MB | Download |
| Printer Driver – Windows 10, Windows 8.1, Windows 8, Windows 7, Windows Vista, Windows XP | 29.21 MB | Download |
| Scanner Driver – Windows 10 x64, Windows 8.1 x64, Windows 8 x64, Windows 7 x64, Windows Vista x64, Windows x64, Windows 10, Windows 8.1, Windows 8, Windows 7, Windows Vista, Windows XP | 26.63 MB | Download |
| Mac OS | ||
| Printer Driver – Mac OS X – Intel, Mac OS X – PowerPC | 48 MB | Download |
| Scanner Driver – Mac OS X – Intel | 24.48 MB | Download |
Installing the Driver: A Step-by-Step Guide
Once you’ve downloaded the driver package, follow these steps to install it correctly.
Installing on Windows
1. Locate the Downloaded File: Find the driver package you downloaded (usually in your “Downloads” folder).
2. Run the Installer: Double-click the downloaded file to start the installation process.
3. Follow the On-Screen Instructions: The installer will guide you through the installation process. Read each screen carefully and follow the prompts.
4. Connect the Printer: The installer may prompt you to connect your printer to your computer via USB. If so, connect the printer and turn it on.
5. Complete the Installation: Once the installation is complete, you may be asked to restart your computer. It’s generally advisable to restart.
6. Test the Printer: Print a test page to ensure the driver is installed correctly.
Installing on macOS
1. Locate the Downloaded File: Find the driver package you downloaded (usually in your “Downloads” folder).
2. Open the .dmg File: Double-click the downloaded .dmg file to mount it.
3. Run the Installer: Open the mounted disk image and double-click the installer package (.pkg file).
4. Follow the On-Screen Instructions: The installer will guide you through the installation process. Read each screen carefully and follow the prompts.
5. Add the Printer (if necessary): After the installation, you might need to add the printer in System Preferences. Go to System Preferences > Printers & Scanners and click the “+” button to add your printer.
6. Test the Printer: Print a test page to ensure the driver is installed correctly.
Installing on Linux (General Guidance)
Driver installation on Linux can vary depending on the distribution (e.g., Ubuntu, Fedora). Generally, you’ll need to download a driver package from Epson’s website (if available for Linux) and follow the instructions provided by Epson or your Linux distribution. You might need to use the command line to install the driver.
Troubleshooting Common Driver Issues
Even with careful installation, you might encounter issues. Here are some common problems and how to address them.
Printer Not Recognized
- Check the Connection: Ensure the printer is properly connected to your computer via USB or Wi-Fi.
- Restart the Printer and Computer: A simple restart can often resolve connectivity issues.
- Reinstall the Driver: Uninstall the driver and reinstall it from scratch.
- Check Device Manager (Windows): In Device Manager, look for any errors related to the printer. If you see a yellow exclamation mark, the driver may not be installed correctly.
- Check System Preferences (macOS): In System Preferences > Printers & Scanners, make sure the printer is listed and selected as the default printer.
Printing Errors
- Check Ink Levels: Ensure the ink cartridges have sufficient ink.
- Clean the Print Head: Use the printer’s utility software to clean the print head.
- Update the Driver: Make sure you have the latest driver version installed.
- Check Paper Type and Settings: Ensure the paper type setting in the printer driver matches the paper you’re using.
Scanning Problems
- Ensure the Scanner Driver is Installed: Verify that the scanner driver is installed correctly.
- Check the Scanner Glass: Make sure the scanner glass is clean and free of smudges.
- Restart the Scanner: Turn off the printer and turn it back on to reset the scanner.
When to Consider Reinstalling the Driver
Reinstalling the Driver Epson Expression Premium XP-7100 is a good solution when:
- The printer is not responding.
- You are experiencing frequent printing errors.
- The scanner is not working correctly.
- You have recently upgraded your operating system.
- You suspect the driver is corrupted.
Maximizing Your Epson Expression Premium XP-7100 Experience
Beyond drivers, there are other ways to get the most out of your printer.
Understanding Printer Settings
Take time to explore the printer settings in the driver. You can adjust print quality, paper type, color settings, and more. Experiment with different settings to achieve the best results for your specific needs.
Using Epson’s Software Utilities
Epson provides various software utilities with the driver package. These utilities can help you:
- Monitor Ink Levels: Keep track of your ink levels and order replacements when needed.
- Clean the Print Head: Maintain print quality by cleaning the print head regularly.
- Scan Documents: Use the scanner software to scan documents and save them in various formats.
- Update Firmware: Keep your printer’s firmware up to date for optimal performance.
Choosing the Right Paper
The type of paper you use can significantly impact print quality. Use Epson-recommended paper for the best results, especially for photos. Consider using photo paper with a glossy finish for vibrant colors and sharp details.
Optimizing Photo Printing
The Epson Expression Premium XP-7100 excels at photo printing. To get the best results:
- Use High-Resolution Images: Start with high-resolution photos for the sharpest prints.
- Adjust Color Settings: Calibrate your monitor and adjust color settings in the printer driver for accurate colors.
- Select the Correct Paper Type: Choose the appropriate photo paper setting in the printer driver.
- Print in Best Quality Mode: Select the “Best” or “Maximum DPI” print quality mode for the highest level of detail.
Maintaining Your Printer
Regular maintenance can help extend the life of your Epson Expression Premium XP-7100.
- Clean the Printer Regularly: Wipe down the exterior of the printer with a soft, dry cloth.
- Keep the Print Head Clean: Use the printer’s cleaning utility to clean the print head regularly.
- Store the Printer Properly: When not in use, store the printer in a clean, dry environment.
Exploring the Features of the Epson Expression Premium XP-7100
The Epson Expression Premium XP-7100 is packed with features designed to enhance your printing experience.
Wireless Connectivity
The XP-7100 supports Wi-Fi connectivity, allowing you to print from your computer, smartphone, or tablet without the need for a USB cable.
Mobile Printing
Epson’s mobile printing apps (e.g., Epson iPrint) allow you to print directly from your smartphone or tablet. You can also use cloud printing services like Google Cloud Print or Apple AirPrint.
Automatic Duplex Printing
The XP-7100 supports automatic duplex printing, which allows you to print on both sides of the paper automatically, saving paper and reducing costs.
CD/DVD Printing
The XP-7100 can print directly onto printable CDs and DVDs, allowing you to create custom labels for your discs.
Memory Card Slots and USB Port
The XP-7100 has memory card slots and a USB port, allowing you to print photos directly from memory cards or USB drives without the need for a computer.
Conclusion: Keeping Your XP-7100 Running Smoothly
Ensuring you have the correct Driver Epson Expression Premium XP-7100 is the foundation for a seamless printing experience. By following the steps outlined in this article, you can confidently install and troubleshoot drivers, as well as maximize the potential of your printer. Regular maintenance, understanding printer settings, and utilizing Epson’s software utilities will further enhance your experience and keep your XP-7100 running smoothly for years to come.
By staying proactive with your driver management and printer maintenance, you’ll unlock the full capabilities of your Epson Expression Premium XP-7100 and enjoy high-quality printing, scanning, and copying for all your needs.


