
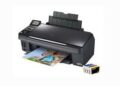
The Driver Printer Epson L380 Ink Tank System is the crucial software bridge that connects your computer to this efficient and reliable printer. Without the correct driver, your Epson L380 won’t be able to translate your digital commands into physical prints. This article provides a comprehensive guide to understanding, installing, troubleshooting, and maximizing your printing experience with the Epson L380, emphasizing the importance of a correctly installed and updated driver. We’ll explore common issues and practical solutions, ensuring your printer operates smoothly and efficiently.
The driver acts as an interpreter, translating the instructions from your operating system into a language the Epson L380 can understand. Think of it as the Rosetta Stone for your printer. Without it, your computer can’t tell the printer what to print, how to print, or even if it’s connected. This is why having the correct driver is paramount.
Why Drivers Matter: Functionality and Performance
The correct driver ensures that all the features of your Epson L380 are accessible. This includes print quality settings, paper size options, color management, and more. A faulty or outdated driver can lead to a range of problems, from poor print quality and incorrect formatting to communication errors and complete printing failure.
Identifying Driver-Related Issues
How do you know if your printer problems stem from a driver issue? Here are some common symptoms:
- Printer Not Recognized: Your computer doesn’t detect the printer even when it’s connected.
- Printing Errors: Error messages appear during the printing process.
- Garbled Output: The printed document contains incorrect characters or formatting.
- Slow Printing: Printing takes significantly longer than usual.
- Incomplete Printing: Only part of the document prints.
- Poor Print Quality: Colors are off, or images appear blurry or pixelated.
If you encounter any of these issues, the first step is to investigate your Driver Printer Epson L380 Ink Tank System installation.
Download Driver Printer Epson L380 Ink Tank System
The most reliable source for your Epson L380 driver is the official Epson website. This ensures you’re getting the genuine, up-to-date driver, free from malware or compatibility issues.
| Compatible Operating System | Size | Download |
| Windows | ||
| Printer Drivers – Windows 10 64-bit, Windows 8.1 64-bit, Windows 8 64-bit, Windows 7 64-bit, Windows XP 64-bit, Windows Vista 64-bit | 39.60 MB | Download |
| Printer Drivers – Windows 10 32-bit, Windows 8.1 32-bit, Windows 8 32-bit, Windows 7 32-bit, Windows XP 32-bit, Windows Vista 32-bit | 36.90 MB | Download |
| Scanner Driver – Windows XP, Windows x64, Windows Vista, Windows Vista x64, Windows 7, Windows 7 x64, Windows 8, Windows 8 x64, Windows 8.1, Windows 8.1 x64, Windows 10, Windows 10 x64 | 25.53 MB | Download |
| Mac OS | ||
| Printer Drivers – Mac OS X – PowerPC, Mac OS X – Intel | 113.53 MB | Download |
| Scanner Drivers – Mac OS X – Intel | 24.99 MB | Download |
Installing the Epson L380 Driver: A Step-by-Step Guide
Once you’ve downloaded the driver, the next step is to install it. Follow these steps carefully to ensure a smooth installation process.
Preparing for Installation
Before you begin, make sure of the following:
- Close All Programs: Close all open applications on your computer.
- Disconnect the Printer (If Connected): If your printer is currently connected to your computer via USB, disconnect it. The installation process will typically prompt you to connect it at the appropriate time.
- Locate the Downloaded File: Find the downloaded driver file on your computer (usually in your “Downloads” folder).
Step-by-Step Installation Process
1. Run the Installer: Double-click the downloaded file to start the installation process.
2. Follow the On-Screen Instructions: The installer will guide you through the installation process. Read each screen carefully and follow the instructions.
3. Accept the License Agreement: You’ll be prompted to accept the license agreement. Read it carefully and click “Agree” or “Accept” to proceed.
4. Select Installation Type: You may be given the option to choose between “Easy Install” and “Custom Install.” “Easy Install” is usually sufficient for most users. “Custom Install” allows you to choose which components to install.
5. Connect the Printer (When Prompted): At some point during the installation, you will be prompted to connect the printer to your computer via USB. Follow the on-screen instructions to connect the printer.
6. Wait for Installation to Complete: The installation process may take several minutes. Do not interrupt the process.
7. Test the Printer: Once the installation is complete, print a test page to verify that the printer is working correctly.
Dealing with Installation Errors
Sometimes, the installation process may encounter errors. Here are some common issues and how to resolve them:
- “Driver Installation Failed”: This error usually indicates a problem with the driver file or compatibility issues. Ensure you’ve downloaded the correct driver for your operating system. Try restarting your computer and running the installation again.
- “Printer Not Found”: If the installer can’t detect the printer, ensure the USB cable is securely connected and the printer is powered on. Try a different USB port.
- Conflicting Software: Other printer drivers or software may conflict with the Epson L380 driver. Uninstall any other printer-related software before attempting to install the Epson L380 driver.
Troubleshooting Common Epson L380 Driver Issues
Even with a correctly installed driver, you may occasionally encounter printing problems. Here are some common issues and their solutions:
Printer Offline
One of the most frustrating issues is when your printer appears offline, even though it’s turned on and connected.
- Check the Connection: Ensure the USB cable is securely connected to both the printer and the computer. If you’re using a wireless connection (though the L380 is primarily USB), check the Wi-Fi connection.
- Restart the Printer and Computer: A simple restart can often resolve communication issues.
- Set as Default Printer: In your operating system’s printer settings, ensure the Epson L380 is set as the default printer.
- Check the Print Queue: The print queue may be paused or contain stuck print jobs. Clear the print queue and resume printing.
- Update the Driver: An outdated driver can cause connectivity problems. Check the Epson website for the latest driver.
Poor Print Quality
If your prints are blurry, faded, or have incorrect colors, the driver may be the culprit.
- Check Ink Levels: Ensure the ink tanks are adequately filled.
- Clean the Print Head: Use the printer’s built-in print head cleaning utility to clear any clogged nozzles. This utility is usually accessible through the printer driver settings.
- Adjust Print Quality Settings: In the printer driver settings, select a higher print quality setting. Options like “High,” “Best,” or “Photo” will produce better results.
- Use the Correct Paper Type: Using the wrong type of paper can affect print quality. Select the appropriate paper type in the printer driver settings.
Printing Errors
Error messages during the printing process can indicate a variety of problems.
- Check the Error Message: Pay close attention to the error message. It often provides clues about the cause of the problem.
- Consult the Epson L380 Manual: The Epson L380 manual contains troubleshooting information for common error messages.
- Search Online Forums: Search online forums and communities for solutions to specific error messages. Other users may have encountered the same problem and found a solution.
Updating Your Epson L380 Driver
Keeping your Epson L380 driver up to date is essential for optimal performance and compatibility.
Why Driver Updates are Important
Driver updates often include bug fixes, performance improvements, and compatibility updates for new operating systems or software. Regularly updating your driver can prevent problems and ensure you’re getting the best possible printing experience.
Methods for Updating Your Driver
- Automatic Updates: Some operating systems automatically check for and install driver updates. Ensure this feature is enabled in your system settings.
- Manual Updates: Periodically check the Epson support website for driver updates. Download and install the latest driver manually.
- Epson Software Updater: Epson may provide a software updater tool that automatically checks for and installs updates for your Epson products, including the L380.
Optimizing Your Epson L380 Printing Experience
Beyond simply installing the driver, there are several ways to optimize your printing experience with the Epson L380.
Choosing the Right Print Settings
The printer driver offers a range of settings that can affect print quality, speed, and ink consumption.
- Print Quality: Choose the appropriate print quality setting for your needs. “Draft” mode is suitable for quick, everyday printing, while “High” or “Photo” mode is ideal for printing photos and documents that require high detail.
- Paper Type: Select the correct paper type to ensure optimal print quality.
- Color Management: Adjust color management settings to achieve accurate colors.
Managing Ink Consumption
The Epson L380’s ink tank system is designed to be economical, but you can further reduce ink consumption by following these tips:
- Print in Draft Mode: When printing documents that don’t require high quality, use draft mode to save ink.
- Print in Black and White: Print in black and white whenever possible to conserve color ink.
- Use the “Economy” Ink Setting: Some printer drivers offer an “Economy” ink setting that reduces ink consumption.
- Avoid Unnecessary Printing: Preview documents before printing to avoid mistakes and unnecessary prints.
Maintaining Your Epson L380
Regular maintenance can help prolong the life of your Epson L380 and ensure optimal performance.
- Clean the Print Head Regularly: Use the printer’s built-in print head cleaning utility to prevent clogged nozzles.
- Keep the Ink Tanks Filled: Avoid running the printer with empty ink tanks. This can damage the print head.
- Store the Printer Properly: When not in use, store the printer in a cool, dry place.
Understanding Print Head Cleaning and its Importance
Print head cleaning is a critical maintenance task for ink tank printers like the Epson L380. Over time, ink can dry and clog the tiny nozzles in the print head, leading to poor print quality, missing lines, or even complete printing failure.
How Print Head Cleaning Works
The print head cleaning utility forces ink through the nozzles at high pressure, dislodging any blockages. This process typically consumes a small amount of ink, so it’s important to use it judiciously.
When to Perform Print Head Cleaning
You should perform print head cleaning when you notice any of the following:
- Missing Lines in Prints: If your prints have missing lines or gaps, it’s a sign that some nozzles are clogged.
- Faded Prints: If your prints are faded or lack color intensity, clogged nozzles may be the cause.
- Inconsistent Print Quality: If the print quality varies from print to print, it could indicate that the print head needs cleaning.
How to Perform Print Head Cleaning
The print head cleaning utility is usually accessible through the printer driver settings.
1. Open Printer Settings: Open the printer settings on your computer. This is usually done through the “Printers & Scanners” section of your operating system’s control panel.
2. Select the Epson L380: Select the Epson L380 from the list of printers.
3. Access Printer Preferences or Properties: Click on “Printing Preferences,” “Properties,” or a similar option.
4. Navigate to the Maintenance or Utility Tab: Look for a tab labeled “Maintenance,” “Utility,” or similar.
5. Select Print Head Cleaning: Click on the “Print Head Cleaning” or “Head Cleaning” option.
6. Follow the On-Screen Instructions: The utility will guide you through the cleaning process. Follow the instructions carefully.
7. Print a Nozzle Check Pattern: After cleaning, the utility will typically prompt you to print a nozzle check pattern. This pattern will show you if the cleaning was successful.
Nozzle Check and Interpretation
The nozzle check pattern consists of a series of lines or patterns that are printed to test each nozzle in the print head.
- Perfect Pattern: If all the lines in the pattern are complete and unbroken, the print head is clean.
- Missing Lines: If some lines are missing or broken, it indicates that those nozzles are still clogged. You may need to perform print head cleaning again.
- Severe Clogging: If a large number of lines are missing, it may indicate severe clogging. You may need to perform a more intensive cleaning cycle or contact Epson support.
Precautions and Considerations
- Avoid Excessive Cleaning: Performing print head cleaning too often can waste ink and potentially damage the print head. Only clean the print head when necessary.
- Use Genuine Epson Ink: Using non-genuine ink can clog the print head and void your warranty.
- If Problems Persist: If print head cleaning doesn’t resolve the issue, the print head may be damaged and require replacement. Contact Epson support for assistance.
By understanding and implementing these techniques, you can ensure your Driver Printer Epson L380 Ink Tank System and the printer itself work in harmony, providing you with years of reliable and high-quality printing. The key is to proactively address potential issues and maintain your printer according to Epson’s recommendations.


