
How to Scan Documents Using Epson Printer (Step-by-Step) – Epson printers are not just for printing—they’re also equipped with powerful scanning capabilities. Whether you’re digitizing paperwork, archiving photos, or sending PDFs via email, knowing how to scan documents using your Epson printer is an essential skill.
The good news is that Epson makes the process intuitive, whether you’re scanning from the control panel, a computer, or your mobile device. In this step-by-step guide, you’ll learn multiple ways to scan documents using any modern Epson printer.
Why Learn to Scan with Your Epson Printer?
Scanning is no longer limited to office settings. From students to freelancers, the ability to scan important documents like contracts, receipts, IDs, or handwritten notes has become an everyday necessity.
Benefits of Using Your Epson Printer to Scan:
- High-resolution scans (up to 1200 dpi)
- Easy conversion to PDF, JPG, or editable text (OCR)
- Integration with email and cloud storage
- Ability to scan multiple pages into one file
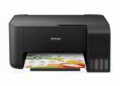
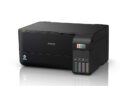
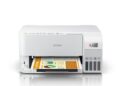
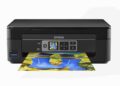
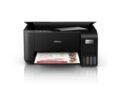
Types of Epson Printers That Support Scanning
Not all Epson models support scanning. Ensure yours includes a scanner bed or automatic document feeder (ADF).
Compatible series include:
- Epson EcoTank: ET-2850, ET-4800, ET-3850
- WorkForce Series: WF-2830, WF-3820, WF-7720
- L Series: L3110, L3150, L5290
- Expression Series: XP-4100, XP-7100
How to Scan Documents Using Epson Printer (Step-by-Step)
Method 1: Scan Using Epson Printer Control Panel
If your printer has a built-in display (LCD or touch), you can scan directly without using a computer.
Steps:
- Place your document face-down on the scanner glass or face-up in the ADF
- Press the Home button
- Navigate to Scan > Scan to Computer / Scan to PDF / Email
- Choose the connected device (your PC name)
- Select file type (PDF, JPEG, etc.)
- Press Start to begin scanning
- The document will be saved to your designated folder (often in “Pictures” or “Documents” folder on your PC)
Note: The computer must have Epson Scan or Epson Event Manager installed and active.
Method 2: Scan from Windows Computer (Using Epson Scan 2)
Epson Scan 2 is the official software for controlling your scanner directly from Windows.
Steps:
- Download and install Epson Scan 2 from Epson’s Support Site
- Launch Epson Scan 2
- Select your Epson printer model from the dropdown
- Choose a scan mode:
- Home Mode – for quick basic scans
- Professional Mode – for DPI, color depth, and advanced settings
- Click Preview to preview the document
- Adjust settings (orientation, crop, brightness)
- Click Scan, then select destination folder and file name
Method 3: Scan from macOS (Preview or Epson Scan Software)
Mac users can scan documents using either Preview or Epson’s official tools.
Using Preview App:
- Go to Applications > Preview
- Click File > Import from Scanner
- Select your Epson printer
- Choose scan mode, format, and destination
- Click Scan
Alternatively, you can install Epson Scan 2 for Mac for more control and OCR features.
Method 4: Scan Using Epson Smart Panel App (Mobile Devices)
Epson Smart Panel is a free app for iOS and Android that lets you scan from your smartphone.
Steps:
- Download Epson Smart Panel from the App Store or Google Play
- Connect your phone to the same Wi-Fi as your printer
- Open the app and select your printer model
- Tap Scan > Document Scan
- Choose file format and resolution
- Tap Start Scan
- Save or share the scanned file directly from your phone
How to Scan Multiple Pages Into One PDF
Many Epson printers and software versions support multi-page PDF scanning.
Steps Using Epson Scan 2:
- Select PDF as file type
- Tick the box for “Save as multi-page PDF”
- After each scan, the software will ask: “Add another page?”
- Click Yes to continue, or Finish to complete
Useful for contracts, books, or business documents.
Understanding Key Scan Settings
| Setting | Description |
|---|---|
| DPI (Resolution) | 300 dpi = good for text; 600+ dpi = photo scans |
| Color Mode | Choose Color, Grayscale, or B/W based on document |
| File Format | PDF = multi-page, JPEG = images, PNG = transparent |
| Destination Folder | Change in settings panel or save prompt |
Always adjust DPI according to your file size and quality needs. Higher DPI = clearer scan, but larger file.
Troubleshooting Epson Scan Issues
| Problem | Fix |
|---|---|
| Printer not detected | Check Wi-Fi/USB connection, restart PC and printer |
| Scans are blurry or cropped | Align paper properly, clean glass surface |
| Software not launching | Reinstall Epson Scan or check system permissions |
| Can’t scan to email | Set up email client or use Smart Panel app |
Make sure your scanner drivers are up to date for stable performance.
Tips to Optimize Scanning Workflow
- Clean the scanner bed regularly to avoid smudges
- Use Document Feeder for fast multi-page jobs
- Create scan shortcuts in the Smart Panel app or Epson software
- Organize scanned files in clearly labeled folders by date/type
- Back up important scanned documents to cloud storage
Conclusion
Learning how to scan documents using your Epson printer unlocks powerful productivity tools—whether you’re working remotely, managing personal documents, or handling business files. From the printer panel to computer apps and mobile tools, Epson provides flexible options to make scanning fast, accurate, and easy.
Take a few minutes to set it up right, and you’ll save hours down the road. With the right settings and tools, your Epson printer is more than just a printer—it’s a full-featured document hub.


